Connector for OData
Troubleshooting
Error messages
OData provider
If errors occur during OData request processing, no details of the errors are returned to the client for security purposes. Instead, depending on the type of error, a reply is generated with a corresponding HTTP error code. If the error occurs within the Intrexx business logic, the portal server log will contain detailed error messages in some circumstances. However, if the error occurs right from the start of request processing, it is only possible to embed the detailed error report in the reply to the client, so that the error can be analyzed.
To do this, the log4j configuration on the Intrexx portal server must be changed in such a way that it uses the DEBUG logging level instead of INFO for the OData Producer module.
To do this, open the \internal\cfg\log4j.properties file in the portal directory in a text editor. Look for the OData producer line in the file, and in the following line, change the value of INFO to DEBUG. After saving the file, restart the portal server to enable the higher level of detail in the error messages.
OData consumer
If errors occur during an OData request, Intrexx attempts to detect the error messages from within the reply from the service and to display them in the browser. This is not possible in all cases. For a more detailed error analysis it can therefore be advantageous to activate OData request tracing in the Intrexx portal server.
Request tracing and error logging
When request tracing is enabled, both the OData requests and responses are written in detail to the Intrexx portal log file. For requests, an entry consists of the HTTP action, the URL, the query options, the request headers, and the XML body. Replies output the HTTP header and the response XML body.Activate tracing as follows:
- Open the log4j.properties file from the /internal/cfg directory in a text editor.
- Navigate to the logging for OData section and change the value from INFO to DEBUG:
# logging for OData log4j.logger.de.uplanet.lucy.server.odata.consumer=DEBUG, File log4j.additivity.de.uplanet.lucy.server.odata.consumer=false - Restart the portal service afterwards.
- For each OData action, the request details will now be logged in the portal.log file.
DEBUG 2014-05-23 09:47:57,384
OData response:
Status: 200
DataServiceVersion: 1.0;
Content-Length: 5074
Server: Microsoft-IIS/8.0
Date: Fri, 23 May 2014 07:47:57 GMT
Content-Type: application/atom+xml;charset=utf-8

<feed xml:base="http://sharepoint2013/myTest/_vti_bin/listdata.svc/" xmlns="http://www.w3.org/2005/Atom" xmlns:d="http://schemas.microsoft.com/ado/2007/08/dataservices" xmlns:m="http://schemas.microsoft.com/ado/2007/08/dataservices/metadata">
	<title type="text">MyTestTasks</title>
	<id>http://sharepoint2013/myTest/_vti_bin/listdata.svc/MyTestTasks</id>
	<updated>2014-05-23T07:47:57Z</updated>
	<link href="MyTestTasks" rel="self" title="MyTestTasks" />
	<entry m:etag="W/"6"">
		<id>http://sharepoint2013/myTest/_vti_bin/listdata.svc/MyTestTasks(2)</id>
		<title type="text">MyTask</title>
		<updated>2014-04-28T14:54:43+02:00</updated>
		<author>
		<name />
		</author>
		<link href="MyTestTasks(2)" rel="edit" title="MyTestTasksItem" />
		<category scheme="http://schemas.microsoft.com/ado/2007/08/dataservices/scheme" term="Microsoft.SharePoint.DataService.MyTestTasksItem" />
		<content type="application/xml">
			<m:properties>
			<d:ID m:type="Edm.Int32">2</d:ID>
			<d:ProcedureName>MyTask</d:ProcedureName>
			<d:StartDate m:type="Edm.DateTime">2014-04-11T00:00:00</d:StartDate>
			<d:DueDate m:type="Edm.DateTime">2014-04-29T00:00:00</d:DueDate>
			</m:properties>
		</content>
	</entry>
	<entry m:etag="W/"5"">
		<id>http://sharepoint2013/myTest/_vti_bin/listdata.svc/MyTestTasks(3)</id>
		<title type="text">PortalVisions 2014 - Infrastructure</title>
		<updated>2014-04-25T17:29:00+02:00</updated>
		<author>
		<name />
		</author>
		<link href="MyTestTasks(3)" rel="edit" title="MyTestTasksItem" />
		<category scheme="http://schemas.microsoft.com/ado/2007/08/dataservices/scheme" term="Microsoft.SharePoint.DataService.MyTestAufgabenItem" />
		<content type="application/xml">
			<m:properties>
			<d:ID m:type="Edm.Int32">3</d:ID>
			<d:ProcedureName>PortalVisions 2014 - Infrastructure</d:ProcedureName>
			<d:StartDate m:type="Edm.DateTime">2014-04-23T00:00:00</d:StartDate>
			<d:DueDate m:type="Edm.DateTime">2014-04-28T00:00:00</d:DueDate>
			</m:properties>
		</content>
	</entry>
</feed>
wrapper.java.additional.12=-Djava.util.logging.config.file= <intrexx>\org\<portal>\internal\cfg\odata\producer\logging.properties
Unsupported OData functions
Although Intrexx provides support for all significant functions in version 2.0 of the OData specification, it can occur that a service does not support certain functions. In this case, it will either cause an error, or a request will not return the expected result. Since the OData specification provides a relatively large scope for the services to be implemented in regard to feature support, if a feature proves to be unsupported, the only way to get around it is to adjust the Intrexx application to only use functions supported by the service.Some examples of these cases are filter definitions, page navigation (Pagination), or sorting. By using the corresponding expert settings, problematic OData features can be deactivated. If certain filter definitions are not supported, the filter must be adjusted or simplified in Intrexx accordingly.
SSL connections
For SSL connections between the Intrexx portal server and an OData service, the Certificate Authority that provided the service certificate must be added to the certificate store of the Intrexx portal server.Self-signed certificates are an exception to this, which are not provided by a recognized Certificate Authority. In order to enable SSL connections to services with self-signed certificates, the check on the certificate chain must be deactivated. This is possible at the service level via a system property.
To do so, open the /internal/cfg/portal.cfg file in the portal directory with a text editor and add a new <systemProperty> entry to the <environment> section:
<systemProperty name = "de.uplanet.lucy.server.odata.consumer.ssl.allowSelfSignedCerts.<SERVICE_GUID>;" value="true"/>
Closing an Intrexx OData sess
Intrexx sessions that were opened via the OData Provider will be closed either by an automatic timeout or upon request by the client. In the case of timeouts, a distinction is made between anonymous and authenticated sessions. By default, a timeout of 60 seconds is used for anonymous sessions. For authenticated sessions, the session is automatically closed after 10 minutes without activity. Both timeout values can be changed via a system property. To change the default values, open the file internal/cfg/portal.cfg in a text editor, navigate to the environment section, and add two new <systemProperty> entries:<systemProperty name="de.uplanet.lucy.server.odata.producer.anonymousSessionTimeoutMilliseconds" value="70000"/>
<systemProperty name="de.uplanet.lucy.server.odata.producer.authenticatedSessionTimeoutMilliseconds" value="700000"/>
| Please note that the values for the session timeout must be specified in milliseconds. The changes will be applied after the portal service is restarted. |
The second way to close a session is to use a logout request from the OData client. This is done by having the client send a request to the server where the URL ends with the "$logout" path. The session ID, specified in the HTTP header as a cookie, is used to identify and automatically close the Intrexx session.
Appendix
OData specification
A description of the OData protocol as well as the OData specification can be found here.OData Tools
The following tools have proved themselves helpful in creating applications and analyzing problems:- Firefox RESTClient
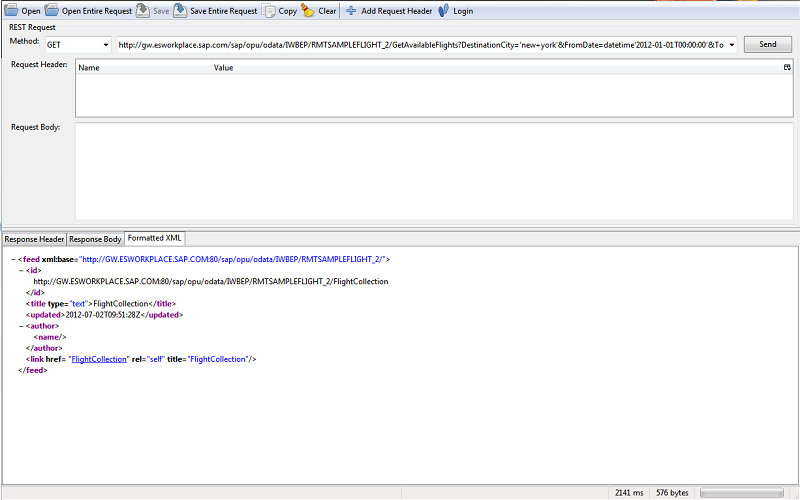
This Firefox plugin can be used to run and analyze OData requests within the browser. This is particularly useful for error analysis. If errors occur, enable Request Tracing, copy the OData HTTP request from the Intrexx portal.log and run it in the REST client, in order to adjust the service to avoid unsupported functions.
http://docs.intrexx.com/intrexx/version/8000/api/mozilla/firefox-restclient.redirect
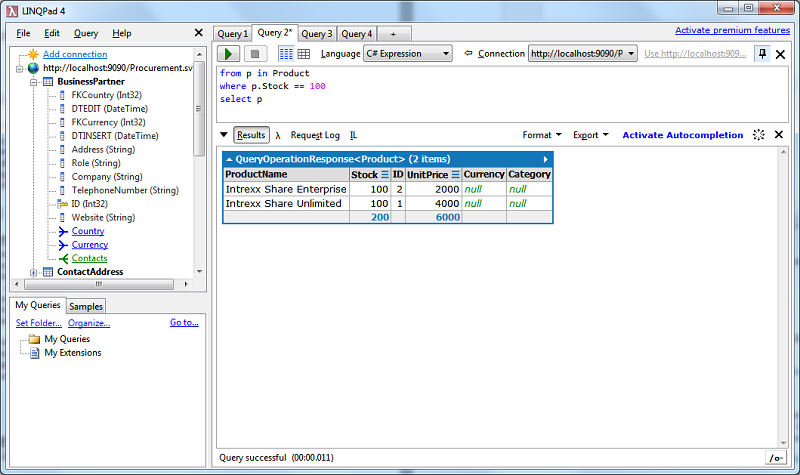
- LinqPad
LinqPad is used to run and visualize requests to an OData service using the Linq request language.
http://docs.intrexx.com/intrexx/version/8000/api/linqpad/linqpad.redirect
- Silverlight OData Explorer
Another tool to run and analyze OData requests in the browser (requires the Microsoft Silverlight plugin).
http://docs.intrexx.com/intrexx/version/8000/api/microsoft/silverlight-odataexplorer.redirect
- Microsoft Visual Studio 2010
The Visual Studio 2010 development environment from Microsoft lets custom OData services based on existing databases to be generated and provided over the Microsoft Internet Information Server with little effort.
http://docs.intrexx.com/intrexx/version/8000/api/microsoft/wcf-data-services-4.5-en.redirect
Reverse proxy configuration
For technical reasons, it is not currently possible to run the portal server and OData services on the same TCP port. For this reason, another port must be selected for Intrexx OData services than the default HTTP port 80 (or 443 for SSL connections), if the portal needs to be available on that port. However, a reverse proxy can be used to run the portal server as well as OData services on the same port. This method uses a forward-facing web server that receives user requests and uses a set of rules to forward the requests to the corresponding back-end system. Various free and commercial reverse proxy solutions are available. The following section describes a sample implementation using the free Nginx web server. The example assumes that both Nginx and the Intrexx portal server are running on the same physical server, and that the portal is available on port 8080 and the OData services are available on port 9090.You can download the current version of Nginx from http://nginx.org. After extracting the downloaded file, the configuration file nginx.conf is located in the child folder /conf. Replace the file with the following sample configuration (you can find a copy of the file in the Intrexx installation directory under \adapter\odata\nginx).
#user  nobody;
worker_processes  1;

#error_log  logs/error.log;
#error_log  logs/error.log  notice;
#error_log  logs/error.log  info;

#pid        logs/nginx.pid;

events
{
	worker_connections  1024;
}

http
{
	include       mime.types;
	default_type  application/octet-stream;

	#log_format  main  '$remote_addr - $remote_user [$time_local] "$request" '
	#                  '$status $body_bytes_sent "$http_referer" '
	#                  '"$http_user_agent" "$http_x_forwarded_for"';

	#access_log  logs/access.log  main;

	sendfile        on;
	#tcp_nopush     on;

	#keepalive_timeout  0;
	keepalive_timeout  65;

	#gzip  on;

	#upstream odata
	{
		#  server 127.0.0.1:9090; #jetty
		#
	}

	#upstream intrexx
	{
		#  server 127.0.0.1:8080; #iis/tomcat
		#
	}

	## IX/OData reverse proxy##
	server
	{
		listen       *:80;
		#server_name  $hostname;

		#access_log  /var/log/nginx/log/www.example.access.log  main;
		#error_log  /var/log/nginx/log/www.example.error.log;
		root   html;
		index  index.html index.htm;

		## send request back to intrexx ##location /ix/
		{
			#rewrite /ix/(.*) /$1 break;
			proxy_pass http://127.0.0.1:8080;
			proxy_next_upstream error timeout invalid_header http_500 http_502 http_503 http_504;
			proxy_redirect off;
			proxy_buffering off;
			proxy_set_header        Host            $hostname;
			proxy_set_header        X-Real-IP       $remote_addr;
			proxy_set_header        X-Forwarded-For $proxy_add_x_forwarded_for;
			proxy_set_header        X-Forwarded-Server $hostname;
		}

		## send request back to odata ##
		location /odata/
		{
			#rewrite /odata/(.*) /$1 break;
			proxy_pass http://127.0.0.1:9090;
			proxy_next_upstream error timeout invalid_header http_500 http_502 http_503 http_504;
			proxy_redirect off;proxy_buffering off;
			proxy_set_header        Host            $hostname;
			proxy_set_header        X-Real-IP       $remote_addr;
			proxy_set_header        X-Forwarded-For $proxy_add_x_forwarded_for;
			proxy_set_header        X-Forwarded-Server $hostname;
		}
	}
}
Now you should make sure that any embedded URLs in OData documents (such as links to related data records) receive the correct endpoint URL. Normally, the name and port of the OData server is used for the URLs. However, when using a reverse proxy, this differs from the endpoint URL. For this reason, a dynamic mechanism is required that uses the correct URL for OData addresses at runtime.
To achieve this, the reverse proxy server sends its host name and port to the back-end system using special request headers (X-Forwarded-*). The back-end system can read the header and use it to create the relevant URL for the clients. To activate this mechanism, use the Host parameter in the OData server configuration. Enter either [X-Forwarded] here to detect the host based on the request headers, or enter the host name and port of the reverse proxy directly in the format hostname:port (which will override the header values).