Intrexx on Microsoft Windows 2012 Server
1. IIS configuration
In order to run Intrexx on a Windows Server 2012, it is first necessary to install the Internet Information Server IIS. Once IIS has been installed, the configuration needs to be adjusted. Use the following settings to configure IIS on Windows Server 2012 to support Intrexx. Open the server manager and click on the Manage menu item. From there, select Add Roles and Features.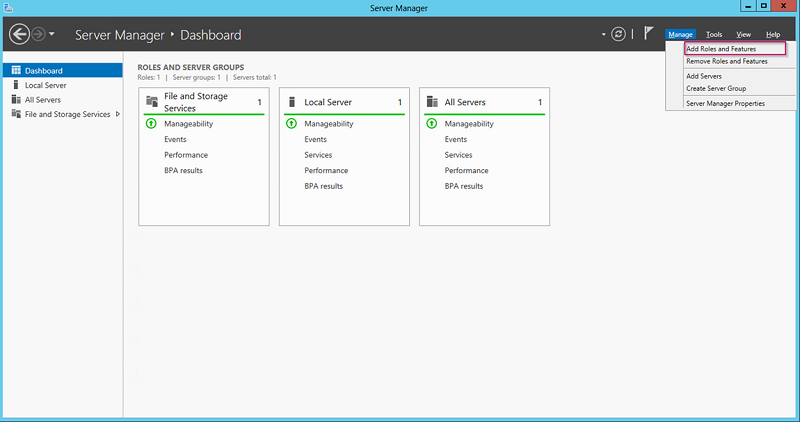
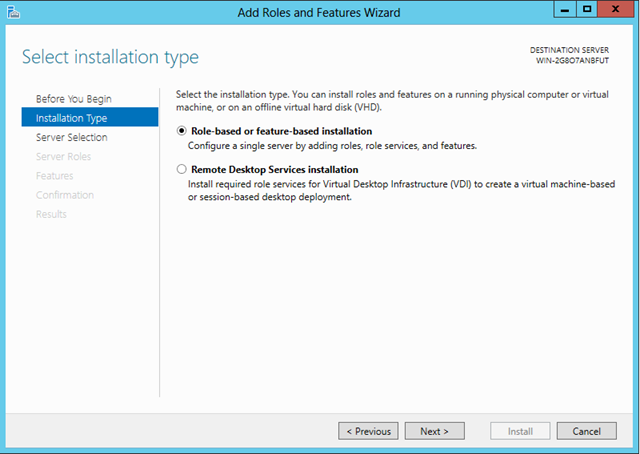
In the following dialog, select Role-based or feature-based installation.
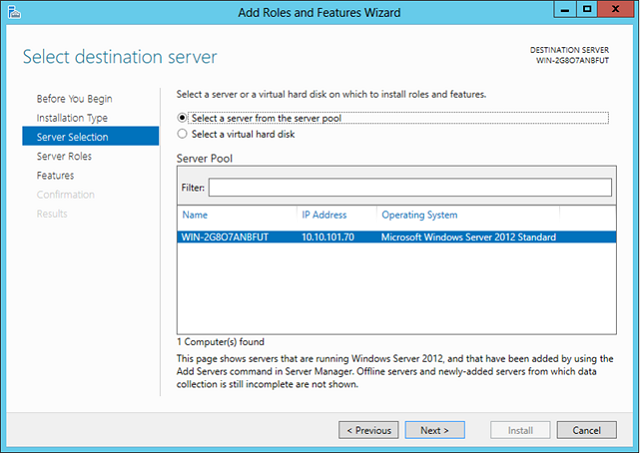
Select your Intrexx server in the next dialog.
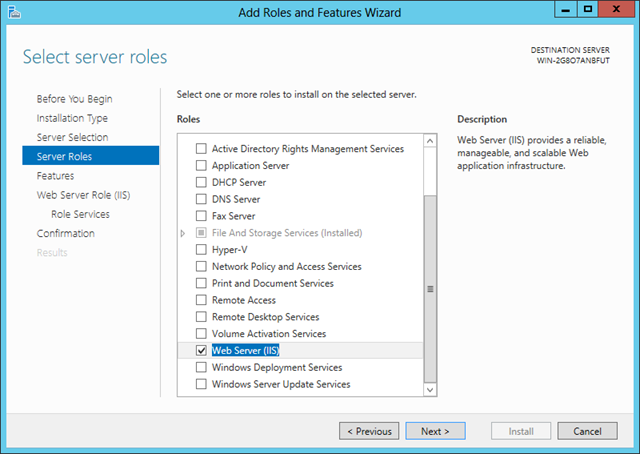
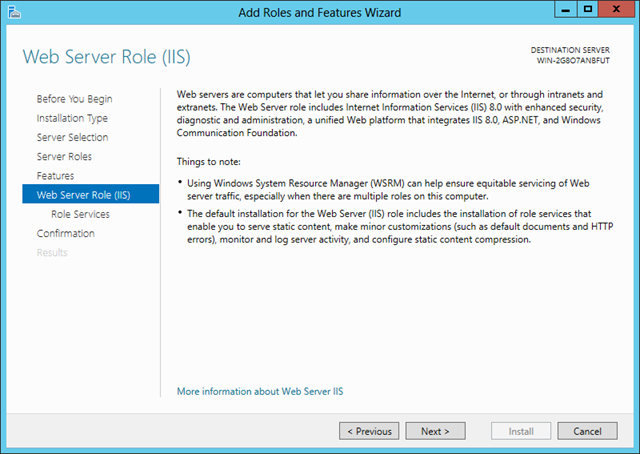
Select the role Web Server (IIS).
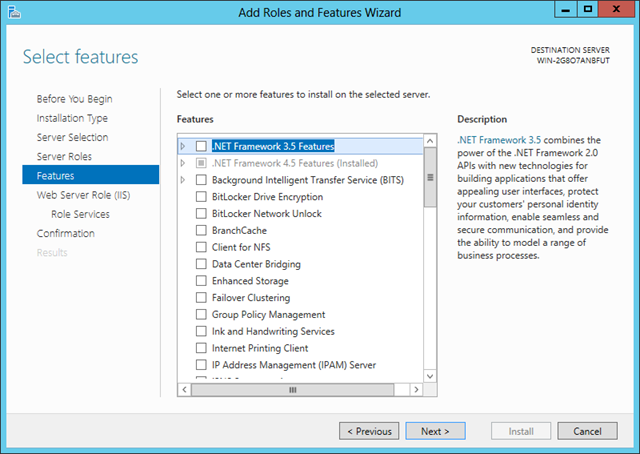
Confirm the following dialog by clicking on Next, without selecting any features.
Read the information in the next dialog and please confirm by clicking on Next.
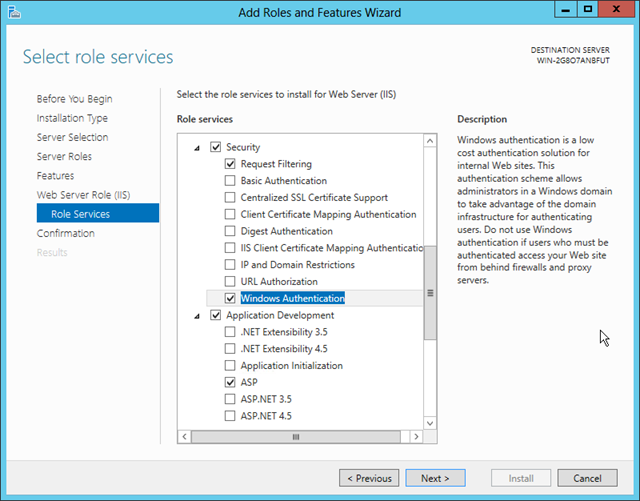
In the Select role services dialog, some services are already highlighted. You only need to select the ASP service from the Application development menu. Thereby, the ISAPI Extensions service will also be activated automatically. This setting should be retained. In the Security menu point, activate Windows authentication if the portal is to be accessed via Single Sign On in a Windows domain. Scroll down further to the Management tools menu item. Here, highlight the IIS 6 Management Compatibility option. The items in the sub-menu to this option will automatically be activated.
2. Settings for file uploads and downloads
The default settings in IIS only allow for smaller files to be uploaded and downloaded in the Web browser. Therefore, the limit properties must be adjusted according to your requirements (size shown in bytes). To do that, open Computer Management, followed by Services and Applications. In the IIS Manager open ASP and edit the Limits Properties Upload (Maximum Requesting Entity Body Limit) and Download (Response Buffering Limit).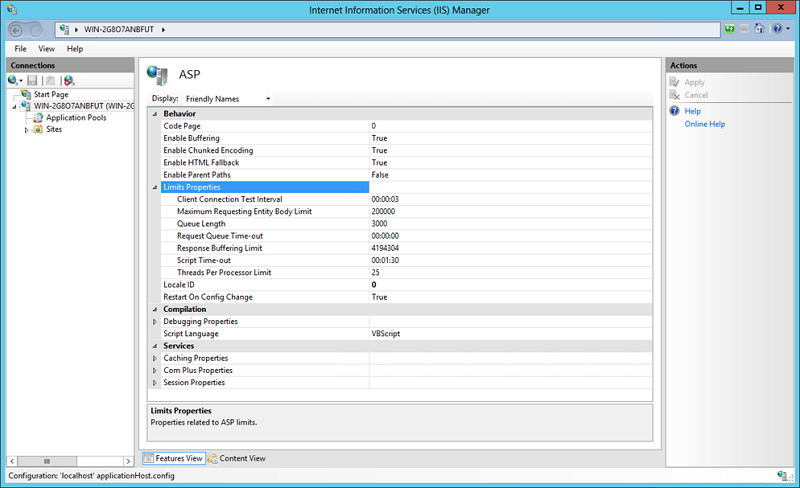
These limit properties are inherited by all existing websites. But it is also possible to set individual limits for each website. The changes will take effect without the need to restart the WWW Publishing service. In addition to these settings, which will make file transfers of up to about 60 Mb possible, transfers of even larger files can be permitted with a further adjustment by specifying the corresponding byte value in the web.config file of the Intrexx portal. To do this, open the web.config file, which can be found in the portal directory /external/htmlroot/ in a text editor. Before editing the field, you should create a backup copy. Add the highlighted area (see below), and edit the byte value as required. The changes will take effect immediately after the file has been saved.
<?xml version="1.0" encoding="UTF-8"?>
<configuration>
 <system.webServer>
  <staticContent>
   <clientCache cacheControlMode="UseMaxAge" cacheControlMaxAge="3650.00:00:00" />
  </staticContent>
  <httpErrors errorMode="Detailed" />
  <security>
   <requestFiltering>
    <requestLimits maxAllowedContentLength="2147483646" />
   </requestFiltering>
  </security>
 </system.webServer>
</configuration>
3. Opening the portal in the browser
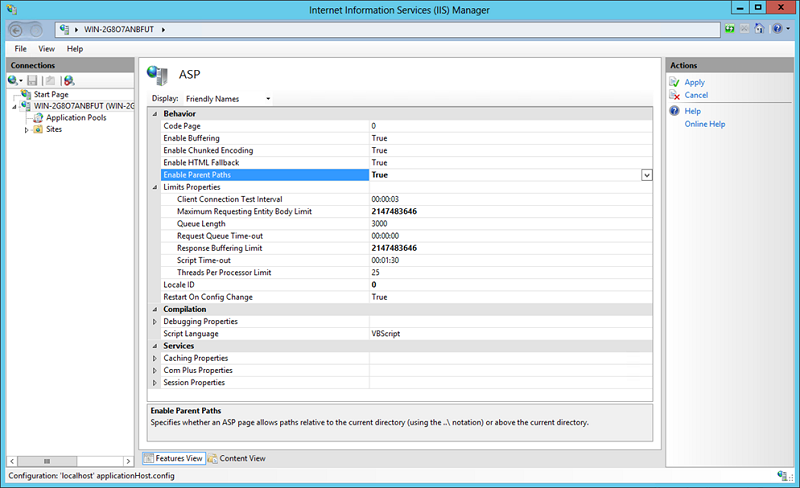
To be able to access the portal at http://servername without specifying the virtual directory, the directory of the default web site must point to <intrexx>\org\portalname\external\htmlroot. This can be carried out in the settings of the settings of the default Web site. Additionally, the Enable Parent Paths option must be set to True in the ASP properties of the Default Web Site.| Please note that these modifications should only be performed after discussing them with your system administrator to avoid system failures in the IT environment. |
If the portal is to be accessible with integrated Windows authentication, Windows authentication must be enabled and Anonymous authentication must be disabled in the settings for the Default Web Site. Depending on the IT environment, these options may be the default settings.
4. Authorization structure
An HTTP 500.19 error may occur when accessing a portal running on Windows Server 2008 Release 2. If this happens, missing user permissions are the cause. Therefore, you need to ensure that the necessary permissions have been granted for the following folders:- Installation directory bin/windows/x86
- Installation directory bin/windows/amd64
- Portal directory external/htmlroot
- Portal directory internal/files
- Portal directory internal/uploadfiles
- <servername>\IUSR
- <servername>\IIS_IUSRs
5. Configuring IIS for using HTTPS
Create and bind a new certificate
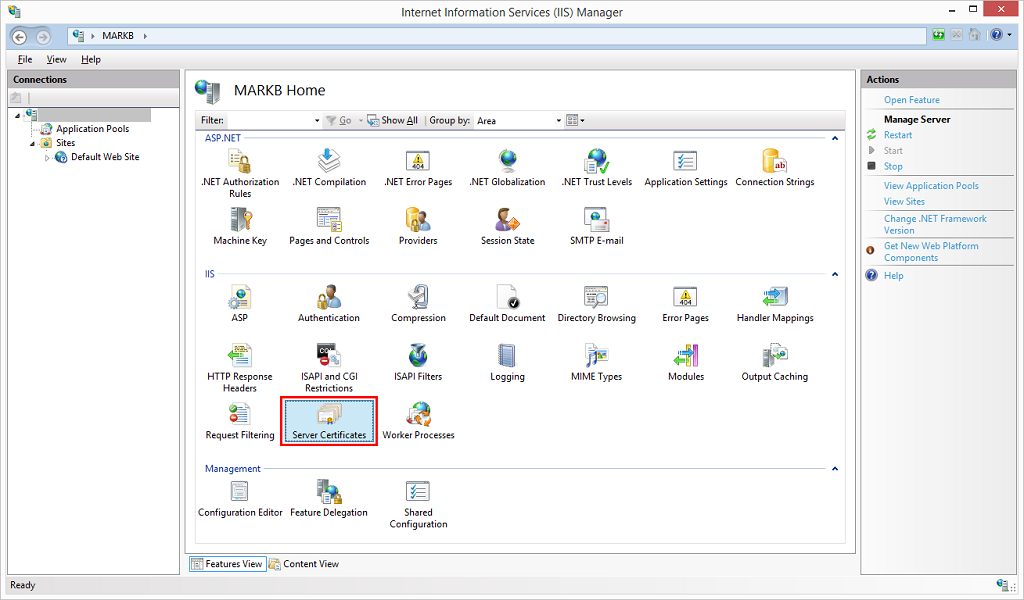
On the IIS start page, click on Server Certificates.
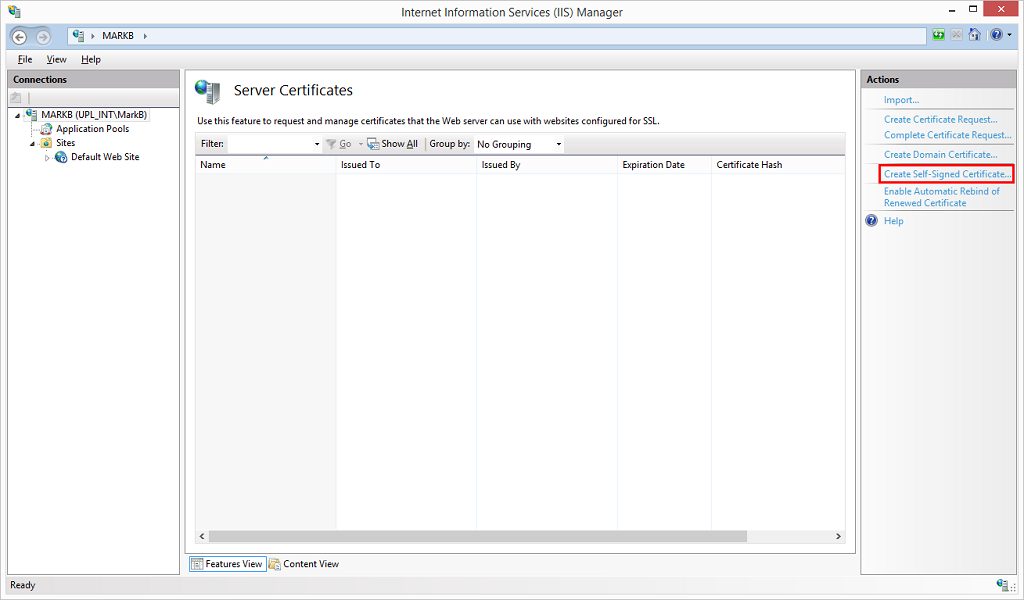
Here, click on Create Self-Signed Certificate.
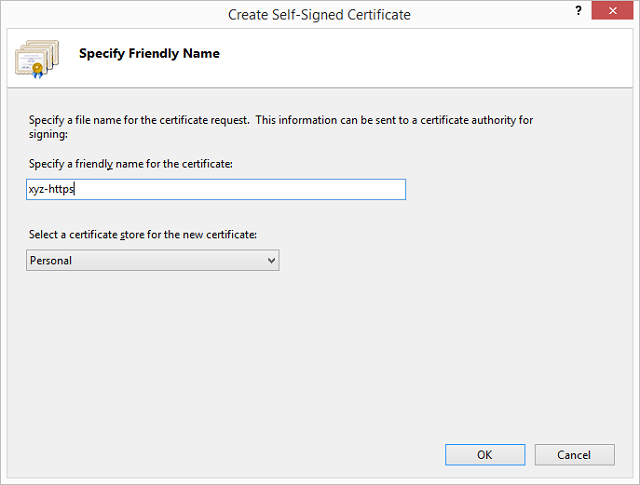
Enter the friendly name and then click on OK.
Create binding
Under Default Web Site, create a new binding.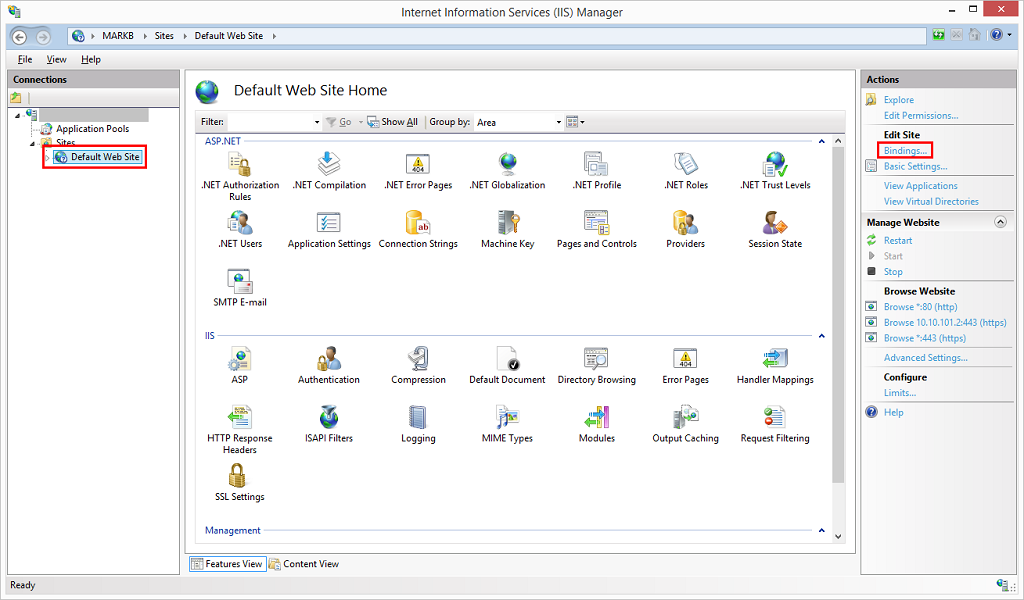
Assign the certificate by clicking on Add. Select https as the type. Enter the other details accordingly and select the certificate by clicking on Select. The binding is created when you click on OK. If you want to completely remove the option of connecting via normal HTTP, you need to remove it here.
Base-URL Intrexx portal
The Base-URL for the portal needs to be adjusted in the Portal properties in the portal manager.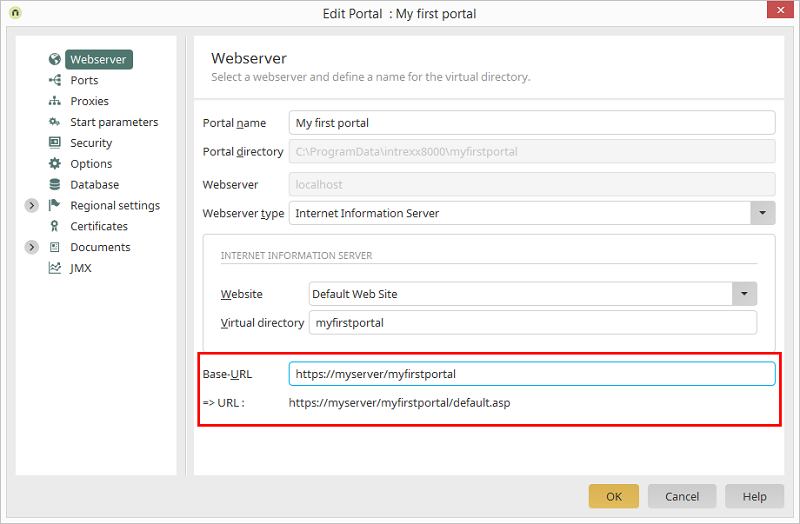
If you are using an official certificate, this must also be stored in the Manager's Certificate Store, as this is required for providing web services, for example. The Certificate Store can be found in the Portal properties.