Setup - Microsoft Windows
1. IIS configuration
If you intend to use IIS as the web server for your Intrexx installation, the IIS configuration needs to be performed before the Intrexx setup. Information about configuring IIS on a Microsoft 2012 Server can be found here. Information about configuring IIS on a Microsoft 2016 Server can be found here. Later during the process of the Intrexx setup, select "IIS Webserver Support" when selecting the packages to be installed.2. Start setup
After downloading Intrexx, unpack the download package. Then execute the file setup.exe.
You can read the End User License Agreement by clicking on License Agreement. You can then activate the checkbox next to I accept all conditions of the license agreement. Click on Next.
3. Select installation type
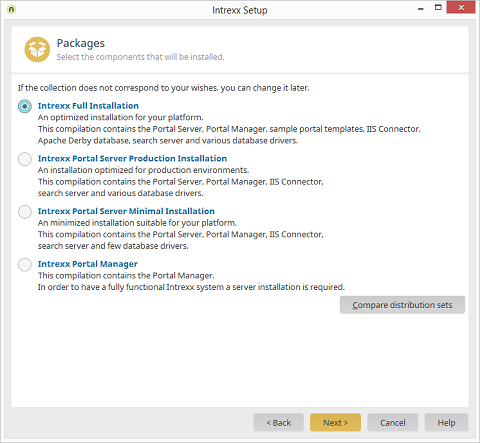
Intrexx consists essentially of two components: the Portal Server and the Portal Manager. On the Portal Server, all Intrexx portals will be stored and administrated. With the Portal Manager, you can connect to an existing Portal Server, and from there either create new portals or edit existing ones.
Intrexx Full Installation
If you have not installed a Portal Server yet, select the option Intrexx Full Installation here. Run this installation on an appropriate system.Intrexx Portal Server Production Installation
With the Production Installation, an optimized distribution set of components for productive use will be installed.Intrexx Portal Server Minimal Installation
With the Minimal Installation, the Portal Server, Portal Manager, IIS connector and the most important database drivers will be installed.Intrexx Portal Manager
With this option, only the Portal Manager will be installed. Select this type of installation if you want to connect to an Intrexx Portal Server from a client, in order to create new portals there or to edit existing portals.Compare distribution sets
Click on this button to open a dialog which will provide you with information regarding the components included in each installation method.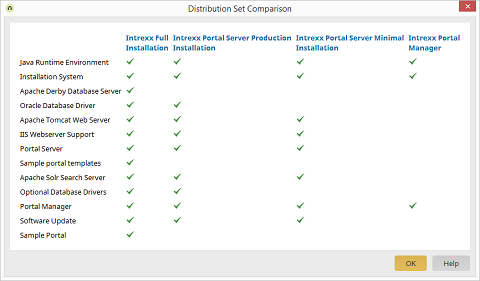
Click on OK.
Close all other running programs and then click on Next.
4. Installation directory
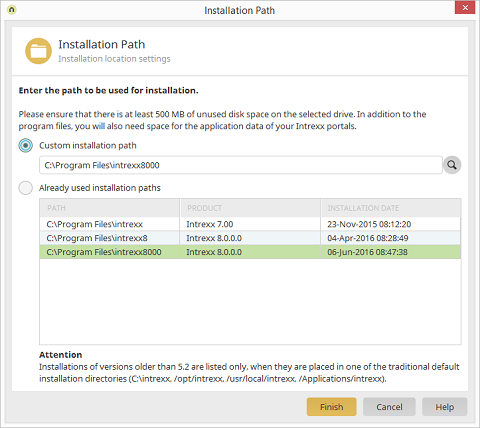
Custom installation path
Enter the desired installation path here or select it by clicking on| The Intrexx installation folder is hidden. It can be made visible via the Explorer settings. |
Already used installation paths
If a version of Intrexx is already available on the system, it will be shown in the area below. You can select this path simply by clicking on it.5. Installation summary
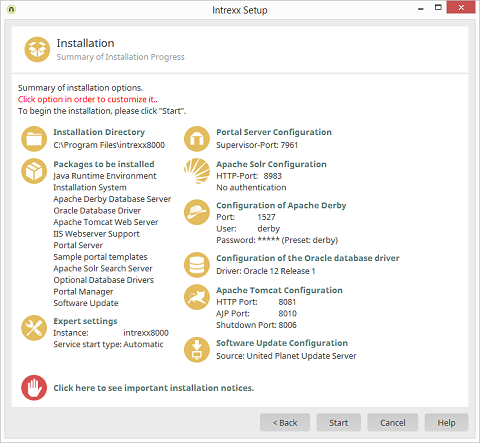
Here you can see the individual components and settings for a full installation. If you want to change settings or components, simply click on the corresponding place in this overview. In the subsequent dialogs, you can apply these changes. In a minimal installation, the range of components in this dialog is reduced accordingly. If you click on the link Click here to see important installation notices at the bottom of the dialog, you'll be able to install ImageMagick in the subsequent dialog. Click on Start.
6. Start installation
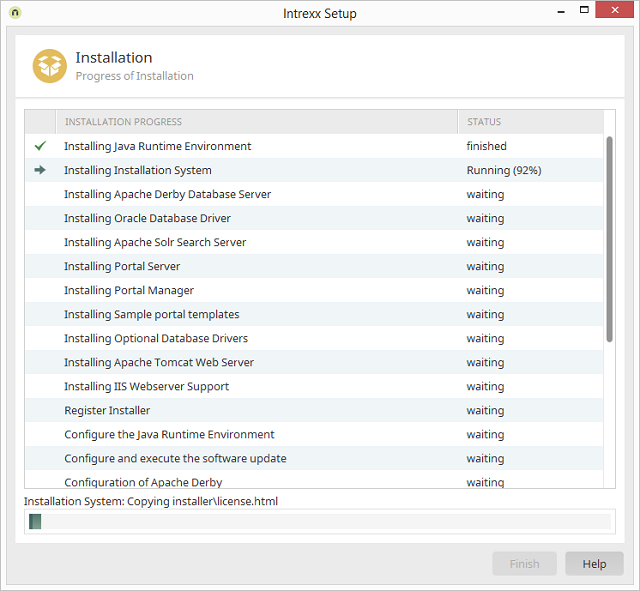
You'll be shown the current installation progress here.
7. Finish the installation
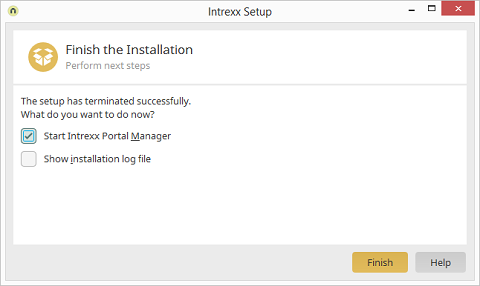
Complete the installation by clicking on Finish. The Intrexx Portal Manager can then be started from the Programs group or desktop shortcut. On Linux systems, you can find manager.sh in the folder <intrexx>/client/bin/linux.
8. (Silent) Command line installation
Intrexx can also be installed by using the command line. To do so, open the Windows command line (Start menu / Run…, then enter cmd), then navigate to the download package and enter the following text:consolesetup.batconsolesetup.bat --configFile=<Path to file>\configuration.properties#Intrexx installation configuration
#TCP-Port for Supervisor Service (default 7960)
de.uplanet.lucy.installer.portalserver.PortalServerPackage.supervisorPort=7960
#Portal server installation
package.de.uplanet.lucy.installer.portalserver.PortalServerPackage=true
#Optional Client (set to false for headless installation)
package.de.uplanet.lucy.installer.portalmanager.PortalManagerPackage=true
#Webserver Connector (set to true, if IIS is used)
package.de.uplanet.lucy.installer.iis.IISPackage=true
#Installation Directory (e.g. c\:\\program files\\intrexx),; please escape special characters with \
installation.dir=c\:\\program files\\intrexx
#Source directory, where the setup files are located; please escape special characters with \
source.dir=d\:\\
#Oracle database support (set to true, if an Oracle DB is used)
package.de.uplanet.lucy.installer.oracle.OraclePackage=false
#Apache Derby database installation
package.de.uplanet.lucy.installer.derby.DerbyPackage=false
de.uplanet.lucy.installer.derby.DerbyPackage.user=derby
de.uplanet.lucy.installer.derby.DerbyPackage.password=derby
de.uplanet.lucy.installer.derby.DerbyPackage.port=1527
#Apache Tomcat Installation, set to true if you want to use Tomcat as webserver
package.de.uplanet.lucy.installer.tomcat.TomcatPackage=false
#Onlineupdate
de.uplanet.lucy.installer.onlineupdate.OnlineUpdatePackage.fileType=false
#Advanced Settings for JRE installed Systems
package.de.uplanet.lucy.installer.instsystem.InstallationSystemPackage=true
de.uplanet.lucy.installer.jre.JrePackage.linked=false
package.de.uplanet.lucy.installer.jre.JrePackage=true
9. Parallel installations
If you would like to install multiple instances of Intrexx, please consider the following points:-
Installation path
Use a different installation directory. Otherwise the new setup will replace the existing Intrexx installation. -
Instance name
Enter a different, unique instance name in the "Extended settings" in the installation summary. Otherwise the new setup will replace the existing Intrexx installation. -
Ports
Make sure the ports for the new Intrexx services and the existing ones are different. -
Database
Use a different portal database. It is especially important for test and development systems that you don't use the same database as the productive system.
10. Uninstall
Intrexx can be uninstalled on Windows systems from the system settings (Programs and Functions). On Linux systems, Intrexx will be uninstalled with uninstall.sh. On Windows systems, the package Microsoft Visual C++ Redistributable will be installed during the installation process of Intrexx as well. It can also be removed via the Control Panel (Programs and Functions).Execution rights
The files uninstall.exe and jbroker.exe require elevated execution rights:| File | Description |
| <intrexx>/uninstall.exe | Starts the uninstall process, deleted files and possible registry information from your system. |
| <intrexx>/jre/windows/amd64/bin/jbroker.exe | Component of the Java runtime environment. Is not used by Intrexx. |